
This article guides you through uploading the BoltTheme .zip file into your Shopify administration panel and publishing it as the active layout for customers.
Step 1: Obtain the Theme Zip File
After completing your purchase of BoltTheme, download the distribution package. Ensure you have the theme file itself, which should remain in its compressed zipped state (e.g. BoltTheme-v1.0.0.zip).
Do NOT extract or unzip this theme file on your computer. Shopify will only accept a raw .zip file containing the standard folder structure (sections/, assets/, layout/, etc.).
Step 2: Upload to Shopify Library
- Log in to your Shopify Admin Panel (e.g.
https://your-store.myshopify.com/admin). - In the left navigation menu, click Online Store > Themes.
- Under the Theme library section of the screen, click the Add theme dropdown and select Upload zip file.
- In the pop-up modal window, click Add file and select the
BoltTheme-v1.0.0.zipfile from your device. - Click Upload file.
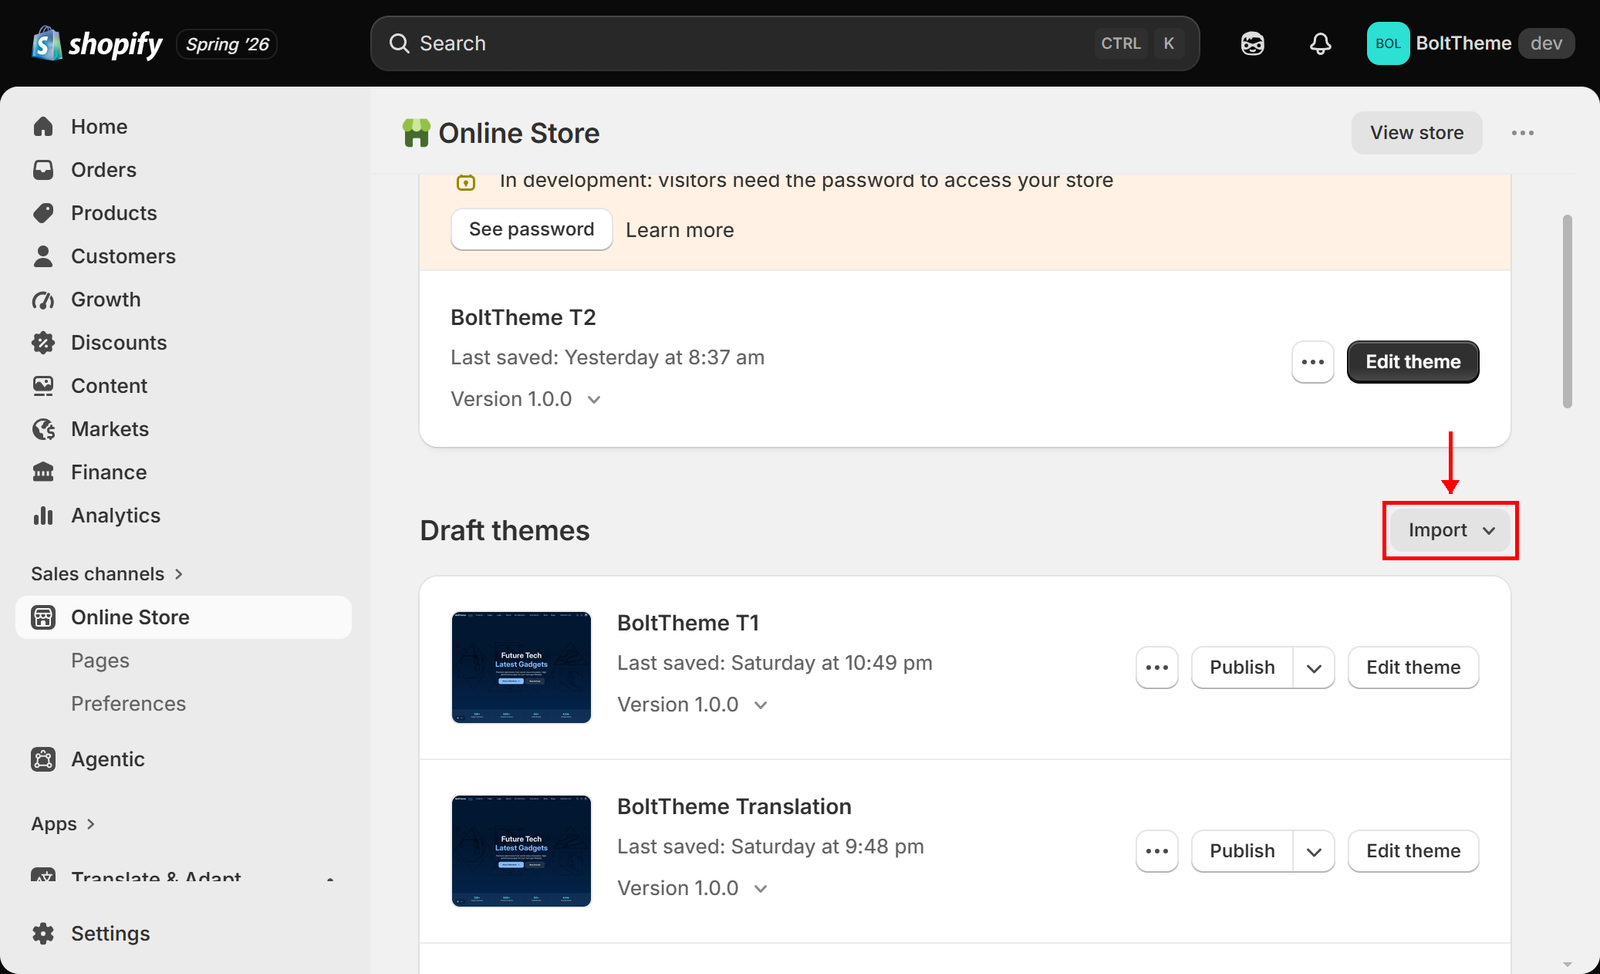
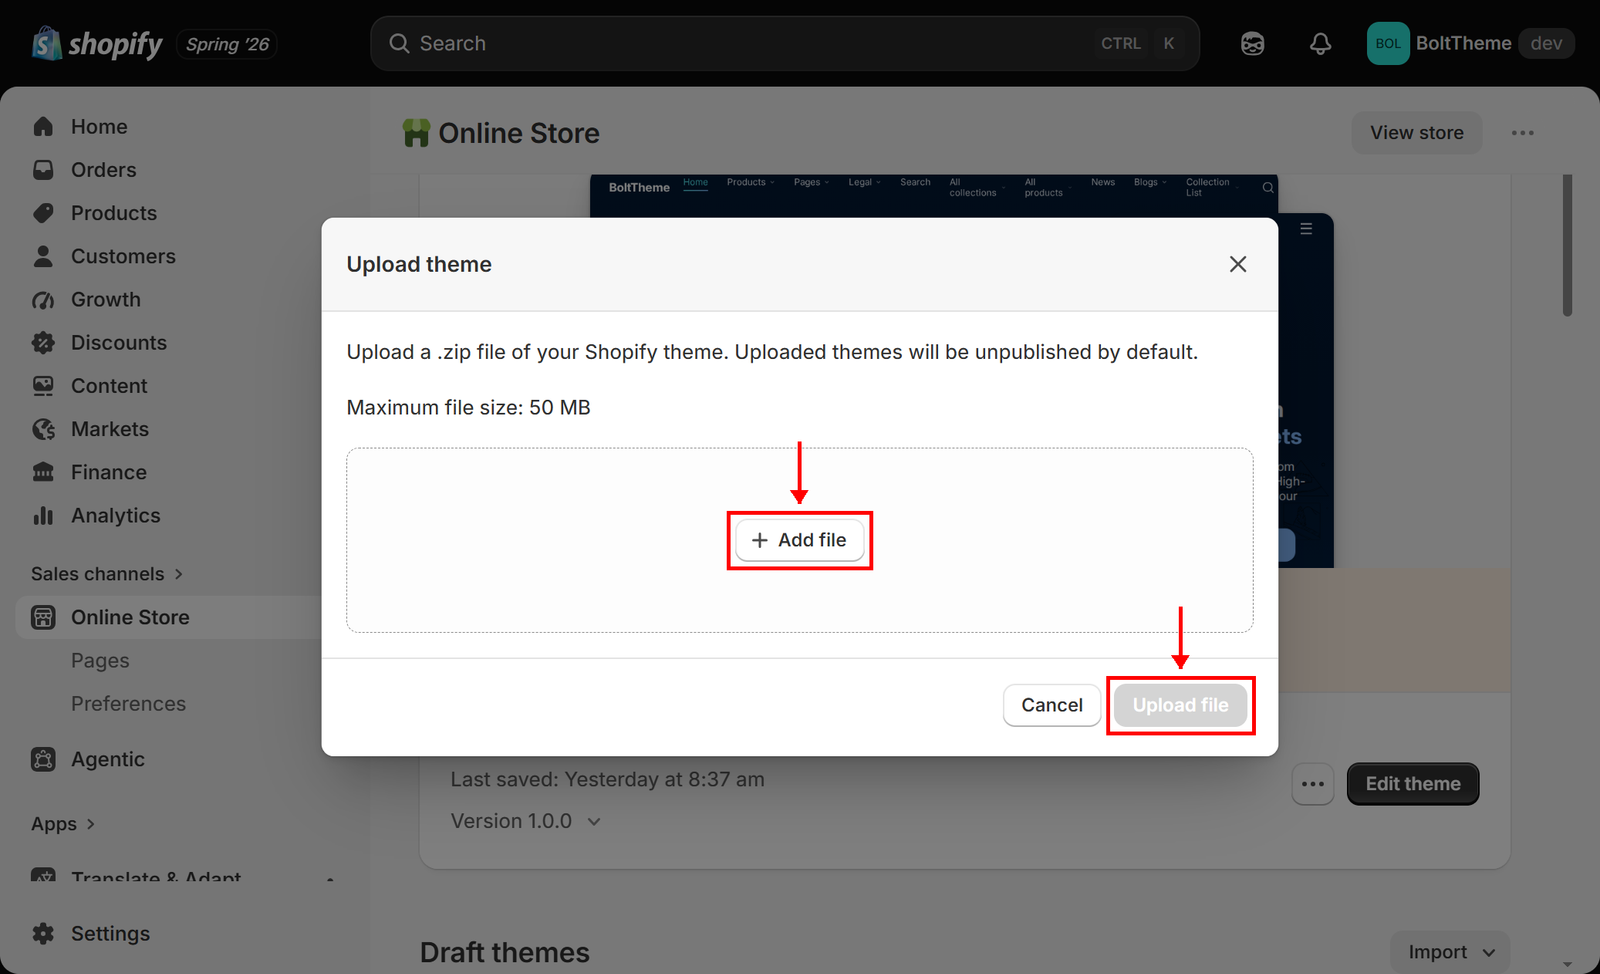
Shopify will display a progress indicator while it uploads the assets. Once completed, BoltTheme will appear in your Theme library list as an unpublished theme.
Step 3: Publish the Theme
An uploaded theme will not display on your storefront until you publish it.
- Locate BoltTheme in your Theme library list.
- Click the Publish button next to the theme name.
- A confirmation modal will appear, warning you that this action will replace your currently active theme.
- Click Publish to confirm.
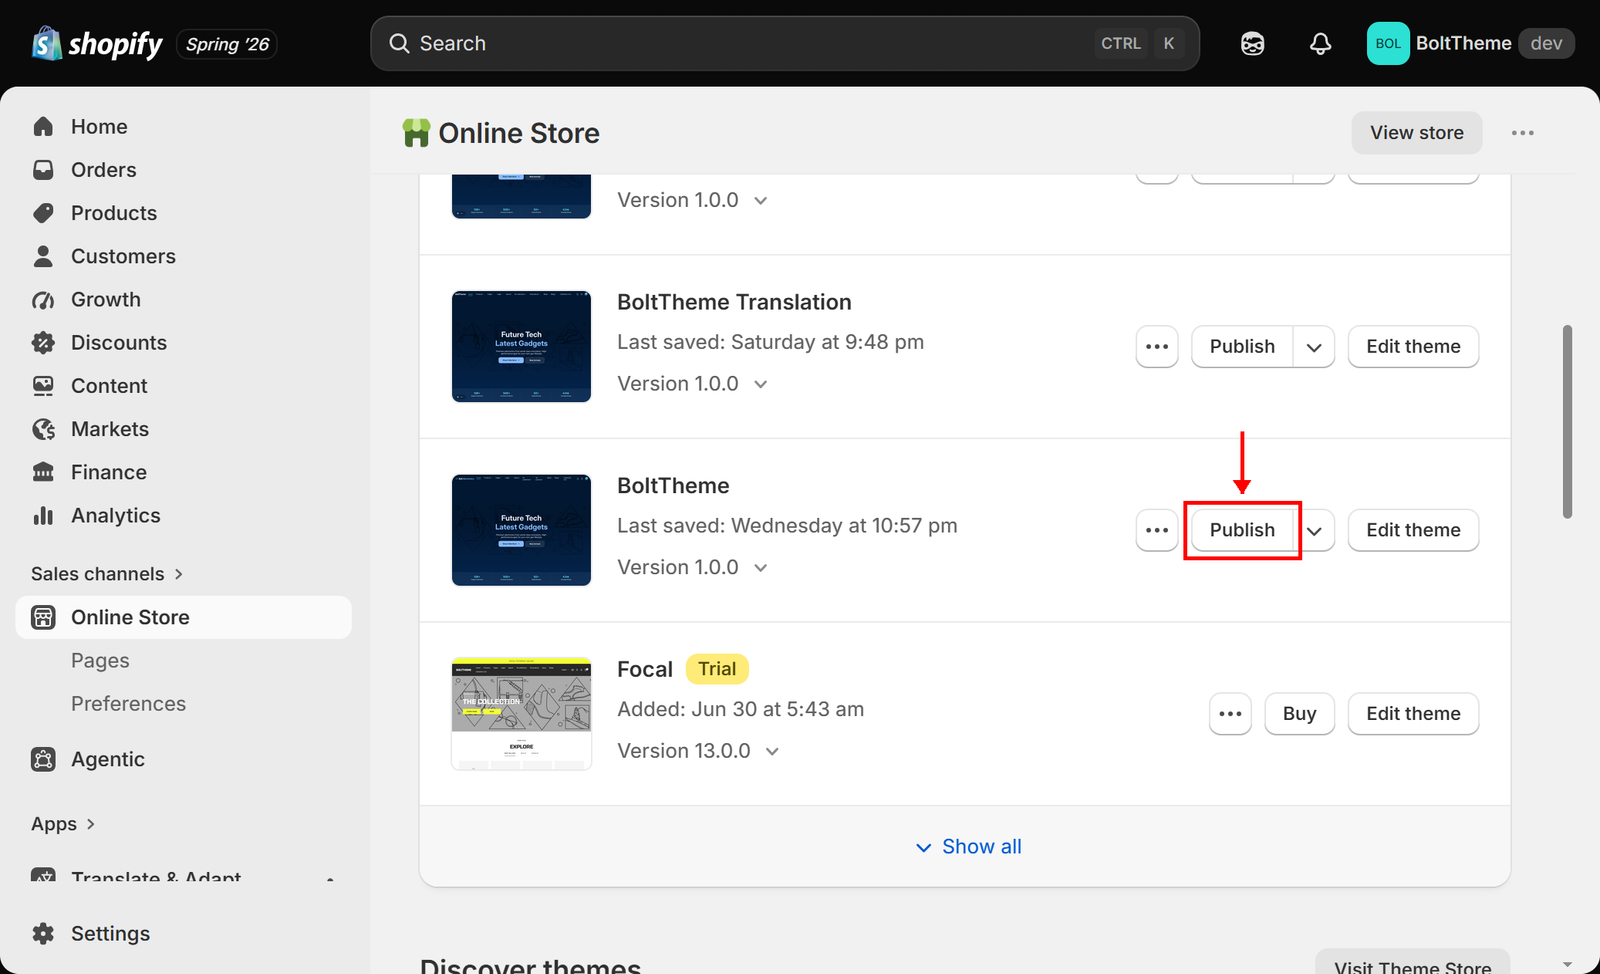
Your storefront will now render the BoltTheme layout system. The previously active theme will be automatically moved to your unpublished Theme library folder as a backup copy.